



Key Takeaways
- Most gutter leaks originate at seams and joints, corroded gutter bases, or separated downspouts.
- A basic garden hose test can accurately pinpoint a leak in under 20 minutes.
- Catching a leak early prevents costly water intrusion into your fascia, soffit, and foundation.
- Minor seam leaks can sometimes be sealed yourself, but persistent or structural leaks need a pro.
Why Finding the Leak Source Matters Before You Call a Pro
Not every gutter leak is the same problem. A drip at a joint costs far less to fix than a gutter section corroded through at the base. Knowing which one you are dealing with before calling a contractor means you can describe the issue clearly, get an accurate quote faster, and avoid paying for a broader repair than you actually need.
Cost savings by pinpointing the problem yourself
A targeted repair almost always costs less than an open-ended service call where the tech spends the first 30 minutes diagnosing from scratch. If you can tell a professional "the leak is at the second seam from the downspout on the north side," you streamline the visit and reduce the risk of scope creep.
You can also rule out whether what looks like a gutter leak is actually a roof or fascia issue. According to Rapid Restore NY’s step-by-step roof leak guide, water often travels along rafters or sheathing before it appears at a visible drip point, which means the stain you see is rarely right above the source. Spending 15 minutes outside with a hose can prevent a misdiagnosed repair.
How water damage spreads faster than you think
A gutter joint dripping half a gallon per hour during a moderate rain seems minor. Over a full Albany winter with freeze-thaw cycles, that same small leak saturates the fascia board, freezes, expands, and can lift your gutter off the house entirely. Wood rot, mold in the soffit, and undermined foundation soil are all realistic downstream consequences.
Capital Region homeowners know this well. Spring rains and fall leaf accumulation put gutters under real stress, and a small ignored problem rarely stays small. Catching gutter leaks early is one of the lowest-cost home maintenance moves you can make.
Three Common Gutter Leak Sources

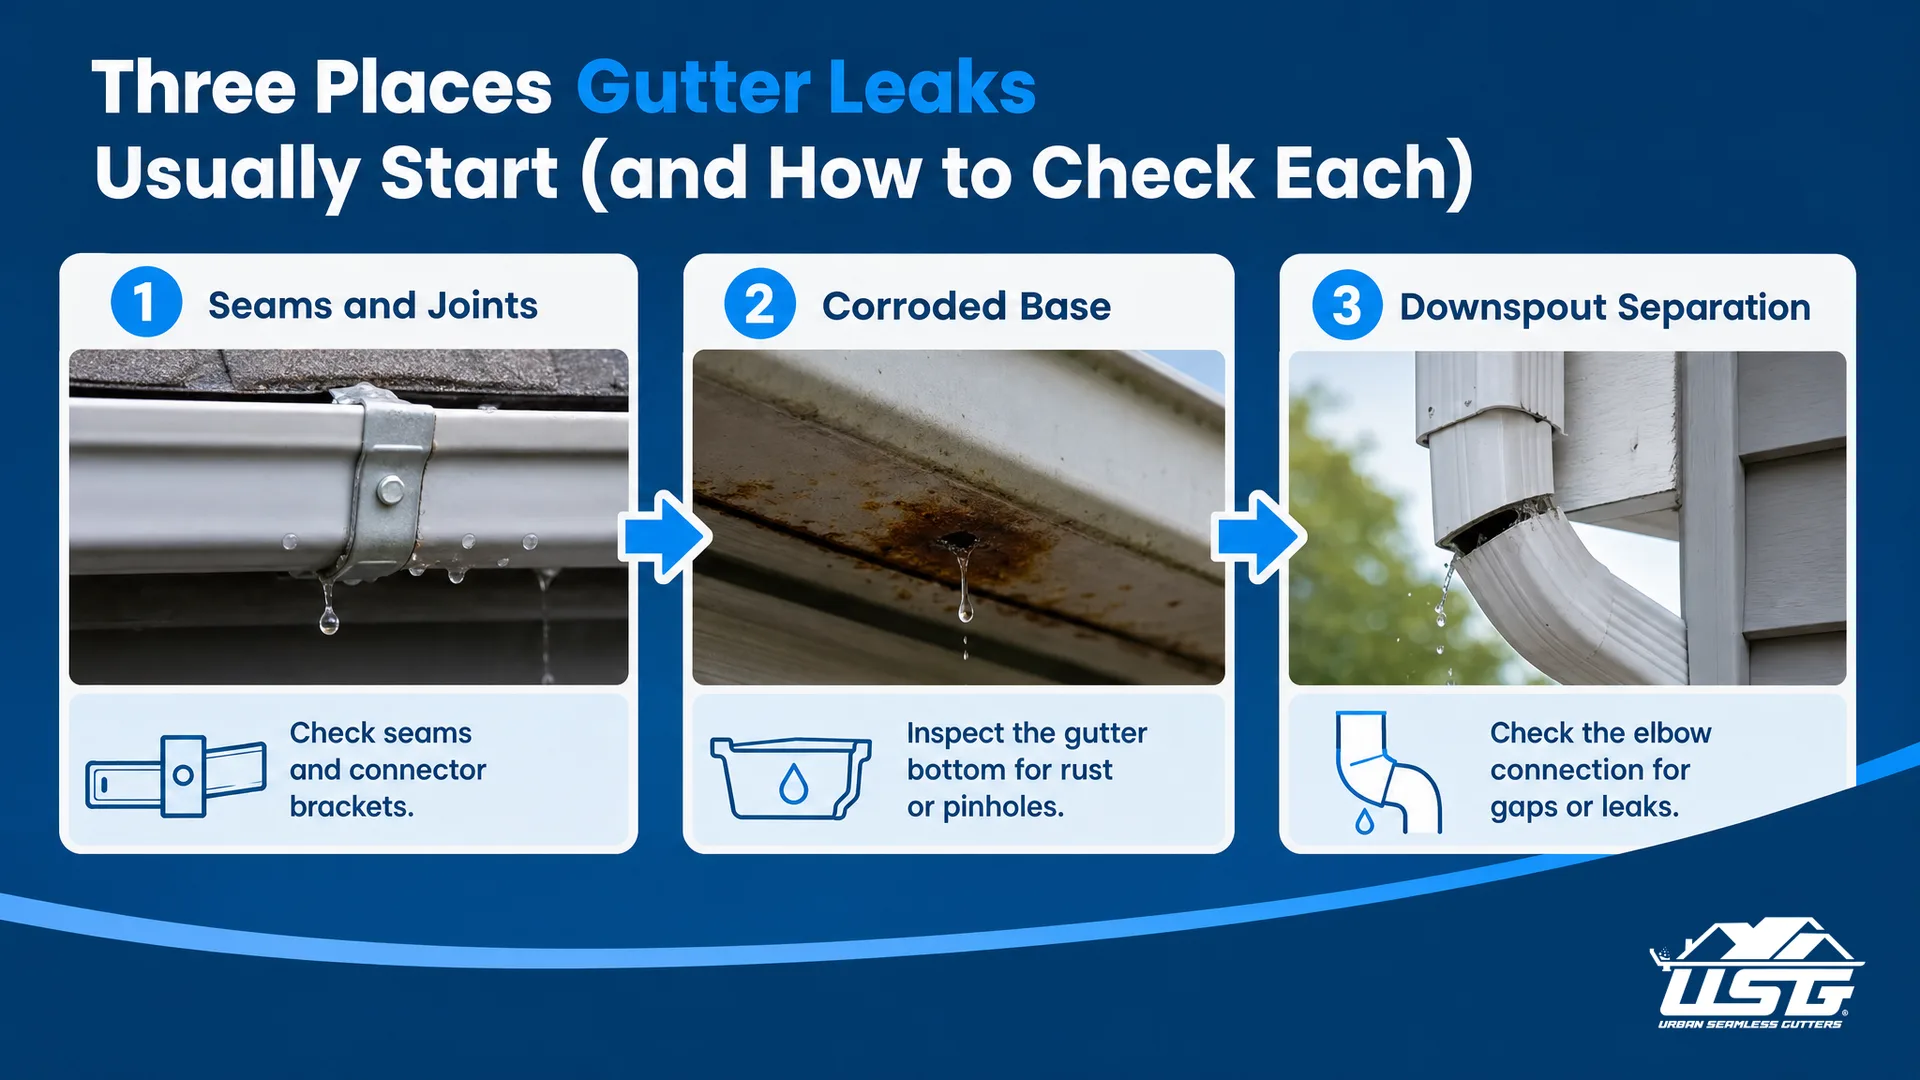
Most residential gutter leaks trace back to three locations: the seams where sections join, the base of the channel where corrosion develops, and the points where downspouts connect or separate from the run.
Source 1: Seams and joints where gutter sections connect
Sectional gutters have seam connectors every 10 to 20 feet. Over time, the sealant inside those joints dries out, shrinks, or cracks under temperature swings. In Albany’s climate, where temperatures can swing 60 degrees between seasons, joint sealant typically lasts 5 to 10 years before it needs attention.
Look for water streaking directly below a connector bracket when it rains. If the drip is at a joint rather than mid-channel, you are almost certainly dealing with a failed seam seal.
Source 2: Holes, rust, and corrosion in the gutter base
Older steel gutters or aluminum gutters that have collected standing debris are prone to rust pinholes in the channel floor. Debris traps moisture against the metal, which accelerates oxidation. You may see rust-colored staining running down your siding or notice actual daylight through the gutter if you look in from above.
Source 3: Downspout misalignment and separation
Downspout outlets are an other high-stress point. The elbow fitting that transitions the gutter into the downspout is held together by screws and a bead of sealant. If the downspout shifts during a freeze or gets knocked by a ladder, that connection can open up and pour water directly against your foundation wall.
Check the back of each downspout elbow for water staining. If you see a gap between the outlet fitting and the downspout tube, that separation is your leak.
How to Inspect Your Gutters Safely
Essential tools and safety gear you will need
You do not need specialized equipment for a basic inspection. A good-quality extension ladder, a spotter to hold it steady, and dry conditions are your baseline requirements. Here is what to gather before you go up.
| Tool or Material | Purpose |
|---|---|
| Extension ladder (rated for your weight) | Safe access to gutters |
| Work gloves | Protection from sharp gutter edges and debris |
| Safety glasses | Debris or water splash protection |
| Garden hose with adjustable nozzle | Simulating rain for the water test |
| Bright flashlight or headlamp | Spotting rust, holes, and sealant failures |
| Marker or tape | Marking leak locations for repair |
| Bucket and small trowel | Clearing debris before testing |
Never work on a wet ladder or in high wind. If your gutters are above one story, strongly consider hiring a professional rather than attempting the inspection yourself.
Step-by-step inspection process during and after rain
Stand at the ground level during a moderate rain and watch where water escapes the gutter channel. Mark those spots mentally or take a photo with your phone. After the rain, go up on the ladder and clear any debris from the sections you flagged.
Then shine a flashlight along the gutter floor and at every joint. Fresh silt lines, rust staining, and cracked sealant are your primary tells.
If you want a clearer look at the full picture, our guide to when to repair, clean, or replace your gutters can help you decide what level of service makes sense once you know where the problem is.
DIY Tests to Locate Leaks Accurately
The water hose method for pinpointing problem areas
This is the single most effective DIY diagnostic for gutter leaks. With one person on the ground watching for drips and one person on the ladder running the hose, you can find most leaks in a single pass.
- Clear the gutter run of leaves and debris first.
- Start the hose at the end of the gutter farthest from the downspout.
- Slowly move toward the downspout, watching for water escaping the channel.
- When you see a drip, mark the spot with tape and note whether it is at a joint, the base, or the downspout connection.
The hose method works because you control the water volume and location, which eliminates the guesswork of trying to diagnose during actual rain.
Visual inspection techniques for hidden leaks
Some leaks are not visible during the test because they only appear under the weight of standing debris or under wind-driven rain conditions. Look for these secondary clues even when you cannot replicate a drip directly.
- Whitish mineral deposits (efflorescence) on brick or block below the gutter line.
- Soft or spongy fascia board when you press against it.
- Paint peeling in a vertical stripe on your siding directly below a gutter joint.
- Erosion channels in the mulch or soil at the base of your foundation.
Each of these points to water escaping the gutter system over a long period. As GRB Roofing explains in their guide to hidden gutter leaks, hidden leaks are often more damaging than visible ones precisely because homeowners miss them until the fascia or framing is already compromised.
Quick Fixes You Can Try Yourself
Temporary sealing solutions for minor leaks
A failed joint seal is a legitimate DIY repair if the gutter is otherwise in good shape. Clean the area thoroughly, let it dry completely, and apply a gutter-specific polyurethane sealant (not standard caulk) from the inside of the joint. Press it firmly into the seam and smooth it with a putty knife.
For small rust pinholes, a metal gutter patch kit bonded with roofing cement works as a short-term fix. Roughen the area with sandpaper, apply the cement, and press the patch flat. This buys time but is not a permanent solution on heavily corroded metal.
When a quick fix is enough versus when you need professional help
A DIY seal works well when the gutter is structurally sound, the problem is isolated to one or two joints, and the surrounding metal shows no signs of widespread rust. It is a reasonable solution for newer gutters where the sealant has simply dried out.
| Situation | DIY Fix Appropriate? | Professional Recommended? |
|---|---|---|
| Single dried-out joint seam | Yes | Optional |
| Small pinhole in otherwise solid gutter | Yes (patch kit) | Optional |
| Multiple rust spots across one run | No | Yes |
| Downspout elbow separated from outlet | Possibly (re-seat and reseal) | If recurring |
| Gutter pulling away from fascia | No | Yes |
| Gutters older than 20 years | No | Yes (evaluate replacement) |
If any doubt exists after your inspection, getting a professional opinion costs nothing with a free estimate from Urban Seamless Gutters.
When to Call a Professional Gutter Repair Specialist
Some problems look small from the ground but reveal deeper issues once a pro gets eyes on them up close. Call a professional gutter repair specialist when you encounter any of the following.

Your gutters are pulling away from the fascia board. This usually means the fascia itself is rotted or the hanger brackets have failed, and no amount of sealant will hold the system in place. A professional needs to assess whether the fascia requires replacement before new hangers can be installed.
You find widespread corrosion across more than one section of the channel. Patching isolated spots is one thing, but if you are looking at rust from one end of a run to the other, the metal has given up. Replacing that run with seamless aluminum is almost always cheaper in the long run than repeated patch jobs on deteriorating material.
Water is entering your home’s interior, pooling at the foundation, or you are seeing mold develop on interior walls below the roofline. These are signs the leak has been active long enough to cause structural damage, and a gutter repair alone may not be the full solution. A professional can help you understand whether a full gutter replacement in the Capital Region is warranted and connect you with the right next steps.
Finally, if your gutters are 20 or more years old and you are finding multiple leak points, chasing individual repairs is rarely cost-effective. A single seamless gutter installation eliminates seam-related leaks entirely, since seamless gutters have no midspan joints where sealant can fail. You can learn more about what that process looks like with our seamless gutter installation guide for Capital Region homeowners.
Frequently Asked Questions
How do I know if my gutter leak is from a seam or a hole in the base?
Run a garden hose slowly along the gutter and watch carefully where water first escapes the channel. If the drip appears directly at a connector bracket or end cap, the joint sealant has failed. If water seeps through the flat bottom of the channel with no joint nearby, you are looking at a corrosion hole or pinhole rust.
Shining a flashlight from inside the channel while it is dry can also reveal small holes you would otherwise miss.
Can I use regular caulk to seal a gutter leak?
Standard bathroom or kitchen caulk is not designed for the temperature swings and water exposure that gutters handle. It cracks and separates quickly, often within one season. Use a gutter-specific polyurethane sealant or butyl rubber sealant rated for exterior metal.
These products are available at most hardware stores and are formulated to stay flexible through freeze-thaw cycles.
How to fix gutter leaks at a downspout connection?
First, disconnect the downspout elbow from the outlet fitting and clean both surfaces with a wire brush. Once dry, apply a bead of gutter sealant around the inside of the outlet fitting before reattaching the elbow. Secure it with sheet metal screws for added stability.
If the outlet fitting itself is cracked or the surrounding gutter metal is soft, the entire outlet needs to be replaced rather than just resealed. For guidance on how to repair gutter leaks beyond basic DIY, a professional can assess whether the connection is salvageable.
How to fix rain gutter leaks caused by ice damming in winter?
Ice dams form when heat escapes through the roof, melts snow, and the melt water refreezes at the cold eave. The expanding ice can force its way under seams and pop joints open. The immediate fix is to carefully remove ice buildup with a roof rake and let the gutter dry before attempting any sealant repair.
However, addressing the underlying attic insulation and ventilation issue is the only long-term solution, as the dam will return each winter if the heat loss is not corrected. Gutter guards can help prevent debris from compounding the problem, but they do not stop ice dams caused by attic heat loss.
How to repair gutter leaks versus when to replace the gutter entirely?
The repair-versus-replace decision comes down to the age of the gutter, the number of problem spots, and the condition of the fascia behind it. A single failed joint on a 10-year-old aluminum gutter is a clear repair candidate. Multiple rust spots, sagging sections, gutters pulling from the house in more than one place, and gutters over 20 years old tip the balance toward replacement.
Will gutter guards prevent leaks from forming?
Gutter guards reduce the amount of debris that settles in your gutters and traps moisture against the metal, which is a leading cause of corrosion-related leaks. They do not, however, prevent joint sealant from aging out or stop physical damage from ice or falling branches. Micromesh gutter guards are particularly effective at keeping fine debris out without restricting water flow.
 Ready for a free quote? Share a few details with Urban Seamless Gutters, we’ll help you choose the right next step. Get a Free Quote |